本指南解释了什么是 多通道 以及如何在 Linux 中在几秒钟内使用 Multipass 立即创建和启动 Ubuntu VM。
内容
什么是多通?
有许多程序和工具可用于部署 Ubuntu 虚拟机以进行测试和学习。 他们之中有一些是 码头工人, KVM, LXD, LXC, 近视, 流浪汉, VirtualBox 和 虚拟机 等等。
我经常使用 KVM、Vagrant 和 Virtualbox 来测试多个 Linux 发行版上的各种应用程序。 今天,我们将学习另一个名为的虚拟化实用程序 多通道.
无论您是普通用户还是开发者还是系统 admin,您可以在 Linux 中使用 Multipass 立即创建和启动 Ubuntu VM。
Multipass 是一个轻量级的命令行 VM 管理器 典范 团队,用于在本地计算机上快速部署 Ubuntu 实例。
由于 Multipass 为您提供最新的实例,您不必在发布时浪费时间进行更新! 使用 Multipass,您可以快速启动新的 Ubuntu VM 并使用它们来测试您的代码或应用程序。
它使用 Linux 上的 KVM、Windows 上的 Hyper-V 和 macOS 上的 HyperKit 以最小的开销运行虚拟机。 它也可以使用 VirtualBox 在 Windows 和 macOS 上。
您可以直接从本地主机在 VM 中运行命令,也可以登录到 VM 的 shell 并从那里运行。 还可以将主机系统的目录挂载到实例中,并在主机系统和 VM 之间共享文件和文件夹。
Multipass 是一个跨平台的应用程序,支持 GNU/Linux、macOS 和 Windows。
在 Linux 上安装 Multipass
多通道可用作 折断 包,所以它可以安装在任何支持的 Linux 操作系统上 snapd.
Snap 预装在从 16.04 LTS、Ubuntu 版本、Solus 3 及更高版本、Zorin OS 等开始的所有 Ubuntu 版本中。在其他 Linux 系统上,您可以按照此处所述安装 Snapd 关联.
安装 Snapd 后,使用命令安装 Multipass:
$ sudo snap install multipass
如果由于任何原因它不起作用,请尝试以下命令:
$ sudo snap install multipass --classic
成功安装 Multipass 后,您将看到以下输出:
multipass 1.0.2 from Canonical* installed
现在让我们继续在我们的本地系统中部署 Ubuntu 实例。
在 Linux 上使用 Multipass 创建和启动 Ubuntu VM
使用 Multipass 运行 Ubuntu VM 非常简单和直接。
1. 启动 Ubuntu 虚拟机
要下载并启动新的 Ubuntu VM,只需运行:
$ multipass launch --name ostechnix-instance
或者,
$ multipass launch -n ostechnix-instance
这里 ostechnix 实例 是我的 Ubuntu VM 的名称。 您可以根据自己的喜好命名 VM。
上面的命令将下载一个全新的最小 Ubuntu 实例并自动启动它。
默认情况下,Multipass 将下载当前的 Ubuntu LTS 版本。
2. 列出虚拟机
要列出系统上当前下载的 VM,请运行:
$ multipass list
示例输出:
Name State IPv4 Image ostechnix-instance Running 10.39.86.203 Ubuntu 18.04 LTS
正如您在上面的输出中看到的,一个名为“的新 Ubuntu 实例”ostechnix 实例” 已启动并正在运行 Ubuntu 18.04 LTS 版本。 并且实例的IP地址是 10.39.86.203.
3. 从本地系统执行 VM 中的命令
Multipass 允许您在 Ubuntu 实例中运行命令。 例如,我们可以使用以下命令查找正在运行的 VM 的系统详细信息:
$ multipass exec ostechnix-instance -- lsb_release -a
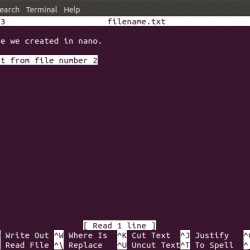
4. 启动 Ubuntu VM 的 shell
无需从本地系统运行命令到 Ubuntu VM,您可以直接启动其 SHELL 并运行命令或根据需要进行任何测试。
$ multipass shell ostechnix-instance
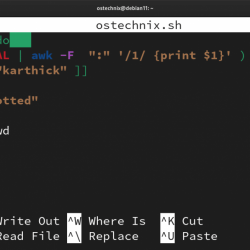
 使用 multipass 启动 Ubuntu VM 的 shell
类型 "exit" 从实例中注销。
5. 找到可用的实例来启动
正如我已经说过的,Multipass 将为您提供当前的 LTS 版本,即 Ubuntu 18.04. 但是,您可以根据需要启动其他可用的 VM。
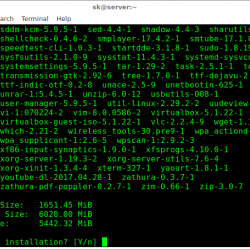
要列出所有可用的 VM,请运行:
$ multipass find
示例输出:
Image Aliases Version Description snapcraft:core core16 20200221 Snapcraft builder for Core 16 snapcraft:core18 20200221 Snapcraft builder for Core 18 core core16 20200213 Ubuntu Core 16 core18 20200210 Ubuntu Core 18 16.04 xenial 20200218.1 Ubuntu 16.04 LTS 18.04 bionic,lts 20200218 Ubuntu 18.04 LTS 19.10 eoan 20200129 Ubuntu 19.10 daily:20.04 devel,focal 20200226 Ubuntu 20.04 LTS
如您所见,Snapcraft 核心、Ubuntu 核心、Ubuntu 16.04、18.04、19.10 和 20.04 每日构建可用。
要启动任何其他实例,请指定图像名称,如下所示。
$ multipass launch --name ostechnix-instance 19.10
此命令将启动一个在 Ubuntu 19.10 上运行的实例。
6.创建自定义规格的实例(CPU数量、硬盘大小和内存大小)
默认情况下,Multipass 将创建 Ubuntu VM 1个中央处理器, 5GB硬盘 和 1GB 内存. 这对于基本测试来说已经足够了。
但是,有时您可能希望创建一个配置低于或高于默认值的 VM。 这也是可能的!
以下命令将启动具有 2 个 CPU、2 GB RAM 和 20 GB 硬盘大小的 VM。
$ multipass launch -c 2 -m 2G -d 20G -n ostechnix-instance
大小可以用后缀指定 钾 (对于知识库), 米 (对于 MB), G (对于 GB)。
- 允许的最小 CPU 数: 1
- 允许的最小硬盘大小: 512 MB
- 允许的最小内存大小: 128 MB
7. 查找正在运行的实例信息
可以通过以下命令查看正在运行的实例的信息:
$ multipass info ostechnix-instance
示例输出:
Name: ostechnix-instance State: Running IPv4: 10.39.86.203 Release: Ubuntu 18.04.4 LTS Image hash: 3c3a67a14257 (Ubuntu 18.04 LTS) Load: 0.08 0.02 0.01 Disk usage: 999.1M out of 4.7G Memory usage: 74.0M out of 985.1M
8. 暂停实例
要暂停正在运行的实例,请运行:
$ multipass suspend ostechnix-instance
验证它是否已暂停或未使用 info 命令:
$ multipass info ostechnix-instance
示例输出:
Name: ostechnix-instance State: Suspended IPv4: -- Release: -- Image hash: 3c3a67a14257 (Ubuntu 18.04 LTS) Load: -- Disk usage: -- Memory usage: --
如你所见,我的 ostechnix 实例 被暂停。
9. 启动和停止实例
要停止正在运行的 VM,请运行:
$ multipass stop ostechnix-instance
启动虚拟机:
$ multipass start ostechnix-instance
10. 从 Multipass 托盘图标管理 Ubuntu VM
如果您对 Multipass 命令行选项不满意,您可以从 Multipass 托盘图标管理 VM。
从主机系统的菜单或仪表板启动 Multipass GUI。 然后,您将在系统托盘上看到 Multipass 图标。
 多通道系统托盘图标
从多通道托盘图标,您可以:
- 启动/停止虚拟机,
- 打开正在运行的虚拟机的外壳访问,
- 禁用/启用多通道自动启动选项,
- 退出多通道。
11. 删除虚拟机
完成 Ubuntu 实例后,如果不再需要它们,您可以将其删除。
首先停止要删除的 VM。
$ multipass stop ostechnix-instance
然后,使用以下命令从本地主机中删除它:
$ multipass delete ostechnix-instance
$ multipass purge
12. 寻求帮助
运行以下命令以查看可用选项和子命令的列表以及说明。
$ multipass help
示例输出:
Usage: multipass [options] <command> Create, control and connect to Ubuntu instances. This is a command line utility for multipass, a service that manages Ubuntu instances. Options: -h, --help Display this help -v, --verbose Increase logging verbosity, repeat up to three times for more detail Available commands: delete Delete instances exec Run a command on an instance find Display available images to create instances from get Get a configuration setting help Display help about a command info Display information about instances launch Create and start an Ubuntu instance list List all available instances mount Mount a local directory in the instance purge Purge all deleted instances permanently recover Recover deleted instances restart Restart instances set Set a configuration setting shell Open a shell on a running instance start Start instances stop Stop running instances suspend Suspend running instances transfer Transfer files between the host and instances umount Unmount a directory from an instance version Show version details
查看每个子命令的帮助部分:
$ multipass help <sub-command>
例子:
$ multipass help launch
资源:
- 多通网站
- 多通道 GitHub 存储库
CloudContainerhyper-vhyperkitHyperVKVMlibvirtLinuxmacOSMultipassOracle VirtualBoxqemuqemu-kvmUbuntuVirtual MachineVirtualBoxVirtualizationWindows